Wednesday, November 20, 2013

Ailerons, primer and top coat

Bought Topgloss BR (Polysiloxane) at COOP along with some rollers and other stash. Then I went to the drug store and got some 60 ml syringes so I can accurately mix smaller amounts of the Topgloss. The syringes were surprisingly inexpensive, 3.5 NOK or about 0.4 Euro a piece.

Finished deburring the cutouts in the ailerons and measured up all the rivets for the ribs. Then I scuffed a test sheet of aluminium to test the Topgloss. I primed half of it with the vinyl primer and left the other half, just to find out how the Topgloss is with primer and without primer. I let it dry until tomorrow. The sheet is actually a faulty piece of RV horizontal stab skin. I really miss my old priming booth when testing all these primers and coating.

I haven't heard anything from Jotun about using Topgloss BR with no primer, so I just have to try it and see how it goes. If this works out, I will coat the whole plane with Topgloss instead of polishing. I'm not too keen on coating the whole plane with this vinyl primer with rattle cans though. If a primer is needed, then my old Monopol wash/etch primer gives a really smooth and thin coat, if it is compatible with Topgloss. But it is also possible to thin out the canned version of the vinyl primer and spray it on with air and achieve the same thickness as the wash primer (30-40 micrometers). Theoretically a 35 micrometer primer covered with a 35 micrometer Topgloss BR gives a total added weight of approximately 2 kg. This weight penalty is nothing when knowing that the polysiloxane is better than any polyurethane out there. In the cockpit I can also use Topgloss BR, hopefully with no primer.

Then the whole plane will be "Pegasus Grey" with tips and cowling in "Draco Red" and maybe with some trimmings in Draco Red as well.


Tuesday, November 19, 2013

Cut the openings in the ailerons and Polysiloxane

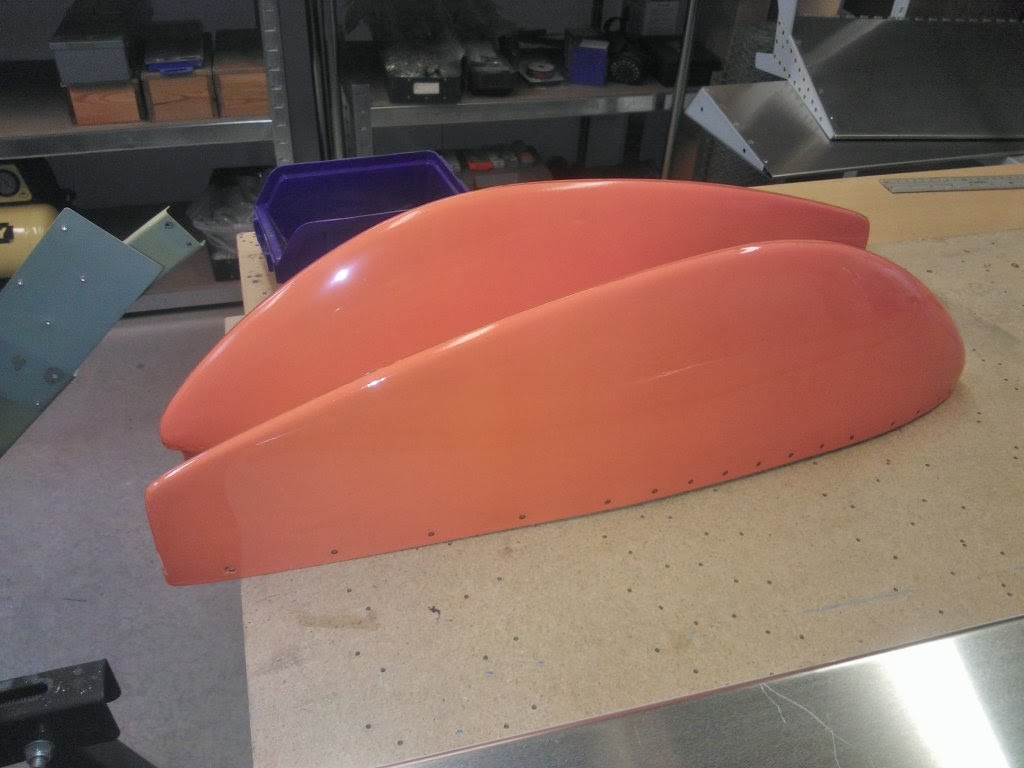
Cut the openings in the ailerons, only deburring left. Also bought a new orange from Hagmans. It was a bit more difficult to get a good finish, but the amount of pigment was abysmal also here. 4 coats of orange, and I still can easily see through it, it's ridiculous. Obviously I am doing something wrong here.

Looking a bit closer at Duplicolor web site what I have to do is first a plastic primer (also for fiber glass), then a white general purpose primer (white primer for bright colors), then the color itself (2-3 coats) and then a 2k transparent epoxy coat (2-3 layers) to achieve mechanical and chemical strength. This is not exactly straight forward and easy anymore, and with all those coats, it gets heavy. I begin to understand why people like Latex paint or real aviation products. The problem for me is that aviation paint products are practically speaking impossible to get. They can be sent from UK or USA, but the cost becomes ridiculous because they are labelled hazardous goods.

Anyway, I had a real eye opener this evening: Polysiloxane coatings. Going for the Jotun Yachting line of products, I only need one coat of Vinyl Yacht Primer (spray or brush) which I already have, and one coat of Topgloss BR, and it will last forever. Topgloss BR is a new 2k polysiloxane coat especially made for brush and roller. It is supposed to be completely smooth and shiny, even when applied with brush and roller, which in fact is the preferable method. Polysiloxane is superior to urethane in all aspects as well as being non toxic, no isocyanates. Polysiloxane coats are completely resistant to UV and oxidation. Generally a coat of polysiloxane is more corrosion resistant, more weather resistant, higher chemical resistance, more temperature resistant, and more glossy than the usual 2 step epoxy primer and urethane top coat.

The "old" Jotun Yachting method was epoxy primer and urethane top coat. The new preferred method is 1k Vinyl primer and a top coat of 2k polysiloxane. The Vinyl primer is preferred because it is smoother (but also needed for wood). So I wonder, on an airplane it should generally be enough with only a coat of polysiloxane with no primer or anything. In fact what the vinyl primer does is only to make a smooth surface for the polysiloxane top coat when using brush and roller, but it could also be that Jotuns formulation of polysiloxane requires a primer for adhesion? I don't know, but my guess is that using polysiloxane directly on aluminium would require 2 or 3 coats because it spreads so thin. And then it is faster and better to use the fast drying vinyl primer that is smooth and can be smoothed further by sanding. The spreading is incredible. 1 liter last for 30 square meters, film thickness of 30 micrometer. The older urethane top finish have the same film thicness, but only goes for 16 square meters due to higher VOC content.

I have read several places that people are using some new paint system and using only brush and rollers, Sprite Aviation for instances. This can only be polysiloxane coatings I guess.

So I ended up "Acetoning" all the orange paint off the tips. From now on there will be only polysiloxane coats on the Onex, with some Vinyl primer here and there (if needed). But this also means that I have to wait until I have more surfaces to cover because the paint is 2k. Another thing is that Jotun don't have orange, they only have a whole bunch of modern non-colors and "Draco Red". So Draco Red it is. Under the inner wing section and on the underside further back I will have some gray polysiloxane to protect the aluminium during the winter.

Sunday, November 17, 2013

Measured ailerons

Cut the ailerons to correct length and measured up all the internal cutouts and ribs. Also deburred all the ribs and plates.

Changed the color from dark green to bright orange. Dark green is nice, but it's so dark that it only looks good in sun shine. Here in Stjørdal the sun is not something that is shining all too often, and then the airplane will look too dull and dark. With orange tips and cowling, the airplane will look similar in color to the picture of the Trial further down (or ordinary Sonex polished style with orange instead of yellow). I think that will look cool, also on rainy days.

The Duplicolor turned out to be really a turn down. The finish really is nice and shining, but there is too little pigment in there. It is literally impossible to cover anything if the prepped surface is anything but white, and when the Duplicolor plastic primer is transparent, there is a problem . The tip that was partially green is impossible to get orange, and the seems in the glass fiber (dark color) shines through. I am also skeptical about duplicolor aluminium primer. I tried to sand it, and it goes off in a couple of wipes. The Jotun Yacht vinyl primer on the other hand, is 10 times as durable and can be sanded to a smooth finish. I also tried the houshold "Quick spray" primer from Scanox, it is much more durable than the Duplicolor. At least the Duralac works really well, and that is the most important thing. The Jotun Vinyl primer can be put on anything, and it can be covered with 2k paint.

I put the dimple die in the drill and sanded it to #31 size, it took ages. On the rudder about 1/3 of the stems had to be sanded a bit. From now on all countersunk skins will be #31.


Saturday, November 16, 2013

Friday, November 15, 2013

Dimpled the H-stab

Dimpled the H-stab. Match drilled the rudder. Now I have to wait for Lasse (the controller) before I rivet the skin onto the skeleton.

I also tried the Duplicolor spray on the tip. It looked nice. The color is dark green. The process will be to use Duplicolor plastic primer on the fiberglass parts and Duplicolor aluminium primer on any aluminium parts I want to paint. Then on top I will use Duplicolor 2K clear paint. This should look nice and be very durable.

I saw on the EAA webinar that some actually use Latex paint. I think Latex paint in the USA is the same as we call acrylic waterbased paint?, normal house paint. It looked very interesting, but I think I will stick to Duplocolor car paint, or else I would have to experiment a whole bunch to find good Latex paint here in Norway.


Tuesday, November 12, 2013

Monday, November 11, 2013

Engine alternatives.

Searched the web to find possible engines. The default is the AeroVee, but there are surprisingly many alternatives with similar HP and weight, maybe lots more than I have found. I sorted them according to price. Realistically the only real alternatives for me are the Revmaster and the Sauer 2200/2400. They are more or less "plug and play".

Name Type HP max RPM (prop) HP cont RPM (prop) cc weight [kg] Price €
AeroVee 2.1 80 3400 80 3400 2180 73 € 5 114,72
Great Plains 2300 80 3600 76 3400 2276 75 € 5 231,71
Revmaster 2300 85 3200 80 3000 2331 77 € 5 765,48
Sauer 1800 UL 68 3200 65 3000 1835 64 € 8 067,57
Viking Honda 110 2300 100 2200 1500 81 € 9 498,24
Sauer 2200 UL 85 3000 80 2700 2234 66 € 9 838,72
Sauer 2400 UL 100 3500 90 3000 2332 75 € 10 873,37
Jabiru 2200 85 3300 80 3000 2200 64 € 11 333,54
Verner Scarlet 7H 110 3500 90 2800 4127 82 € 11 990,00
Rotax 912 UL 80 2200 70 2000 1300 72 € 12 218,29
D-Motor LF26 92 3000 89 2800 2690 57 € 12 600,00
Rotax 912 ULS 100 2200 90 2000 1400 75 € 13 584,16
Sauer S 2100 ULT 110 3000 100 2800 2161 76 € 13 971,39
Jabiru 3300 120 3300 110 3000 3300 84 € 14 550,80
ULPower 260i 97 3300 82 2800 2592 72,3 € 14 700,00
ULPower 260iS 107 3300 90 2800 2592 72,3 € 15 800,00
D-Motor LF39 130 3000 125 2800 3993 78,5 € 17 800,00
Rotax 912iS 100 2200 90 2000 1400 75 € 18 444,42
ULPower 350i 118 3300 102 2800 3503 78,4 € 18 800,00
Limbach L2400 EB 84,2 3200 82 3000 2424 82 € 19 500,00
Limbach L2400 EFI 100 3000 100 3000 2424 76 € 23 900,00